Development
8 min read
This article offers a guide on how to incorporate WalletConnect and Wagmi into a Next.js application.
Leonardo Simone Digiorgio
30 Jun 2023
In the world of Web3 application development, WalletConnect and Wagmi are two powerful tools that empower developers to create seamless and efficient experiences.
WalletConnect acts as a standard protocol, integrating blockchain wallets with decentralized applications (dApps), ensuring secure transactions. It provides chain agnosticism, allowing compatibility with blockchain networks. On the other hand, Wagmi provides a collection of React Hooks that facilitate working with Ethereum. It provides essential functionality such as wallet integration, ENS and balance information display, message signing, contract negotiation, etc.
This article offers a guide on how to incorporate WalletConnect and Wagmi into a Next.js application.
In this article will be use as example my BuyMeACoffee project
First, check out the smart contract used in this project.
// SPDX-License-Identifier: UNLICENSED
pragma solidity ^0.8.9;
contract BuyMeACoffee {
error EmptyValue (string name, string message);
error InsufficientFunds(uint256 msgValue);
// Event to emit when the Memo is created
event NewMemo(
address indexed from,
uint256 timestamp,
string name,
string message
);
struct Memo {
address from;
uint256 timestamp;
string name;
string message;
}
// List of all memos received from friends
Memo[] memos;
// Address of contract deployer
address payable owner;
// Deploy logic
constructor() {
owner = payable(msg.sender);
}
/**
* @dev buy a coffee from contract owner
* @param _name name of the coffee buyer
* @param _message a nice message from the coffee buyer
*/
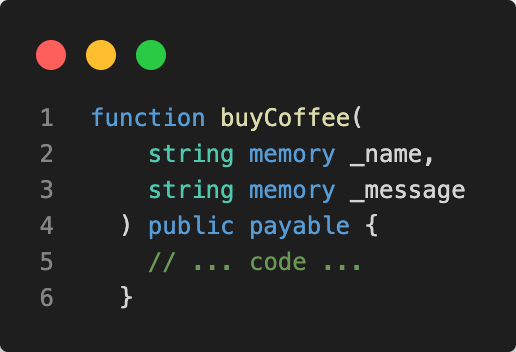
function buyCoffee(
string memory _name,
string memory _message
) public payable {
if(msg.value < 0.001 ether) {
revert InsufficientFunds({
msgValue: msg.value
});
}
if(bytes(_name).length == 0 || bytes(_message).length == 0) {
revert EmptyValue({
name: _name,
message: _message
});
}
memos.push(Memo(msg.sender, block.timestamp, _name, _message));
// Emit a log event when a new memo is created
emit NewMemo(msg.sender, block.timestamp, _name, _message);
}
/**
* @dev send the entire balance stored in this contract to the owner
*/
function withdrawTips() public {
require(owner.send(address(this).balance));
}
/**
* @dev retrieve all the memos received and stored on the blockchain
*/
function getMemos() public view returns (Memo[] memory) {
return memos;
}
}
In short, the BuyMeACoffee contract allows users to buy a coffee by sending Ether to the contract owner along with a personalized message. It stores the received memos and allows the owner to withdraw the accumulated funds.
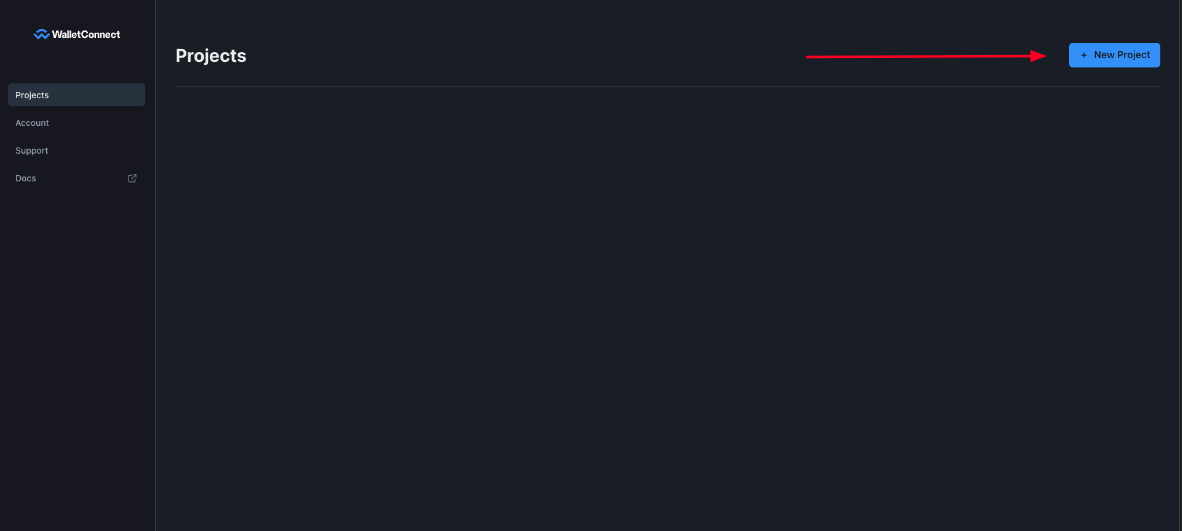
Obtain Project ID To install Web3Modal and Wagmi, you need to obtain a Project ID from WalletConnect Cloud by signing in or signing up and creating (or using an existing) project. Once you have the Project ID, you can add it to your .env file and next.config.js file.
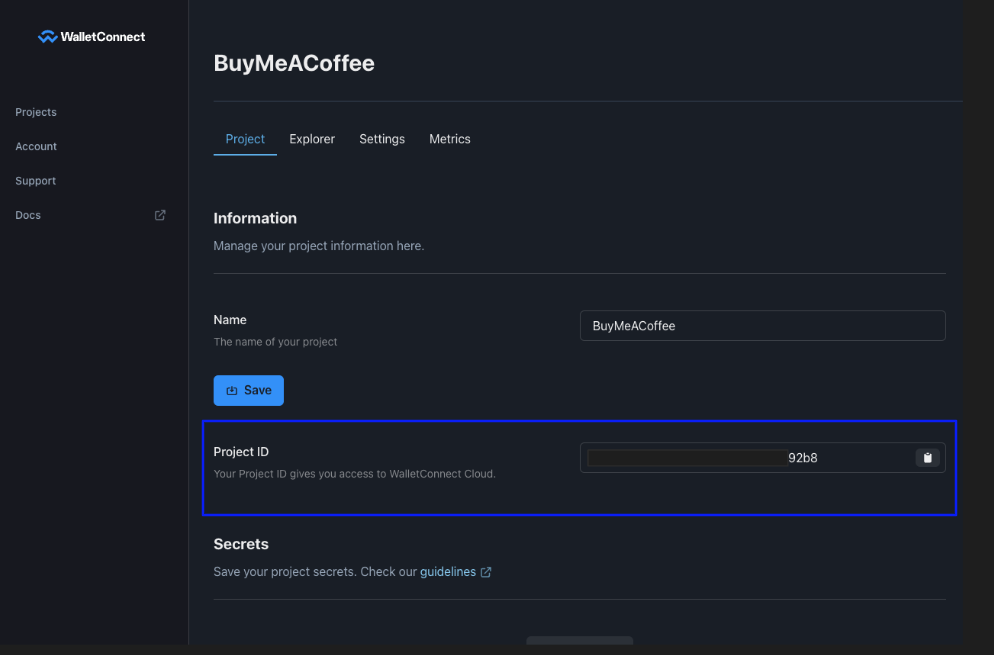
Put the Project ID into .env
WALLET_CONNECT_PROJECT_ID=<YOUR_PROJECT_ID>
Configure the next.config.js for get access to process.env.WALLET_CONNECT_PROJECT_ID in your code
/** @type {import('next').NextConfig} */
const nextConfig = {
  reactStrictMode: true,
  env: {
    WALLET_CONNECT_PROJECT_ID: process.env.WALLET_CONNECT_PROJECT_ID,
  },
};

module.exports = nextConfig;In your terminal, run the command below to add the needed packages:
npm install @web3modal/ethereum @web3modal/react wagmi viem
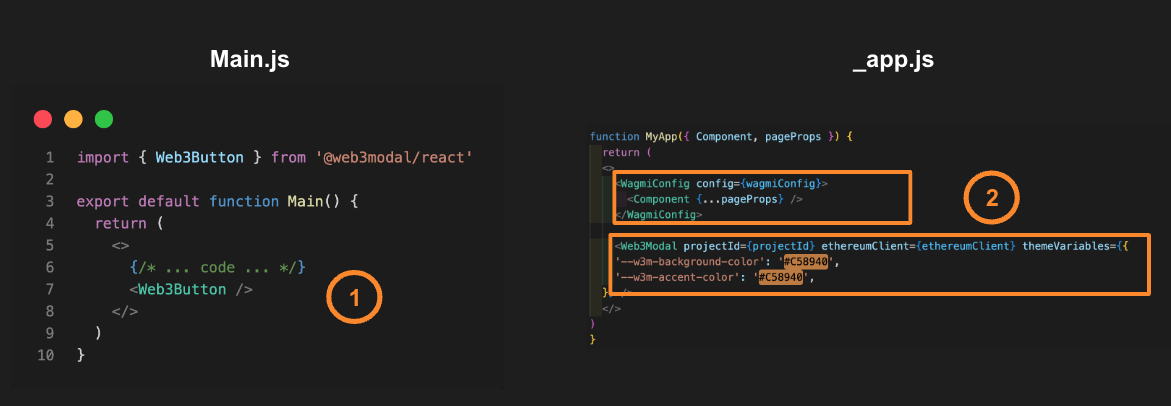
Start by importing Web3Modal and Wagmi packages, then create Wagmi config using your own settings or our default presets as shown below. Finally, pass wagmi config to Web3Modal as ethereumClient.
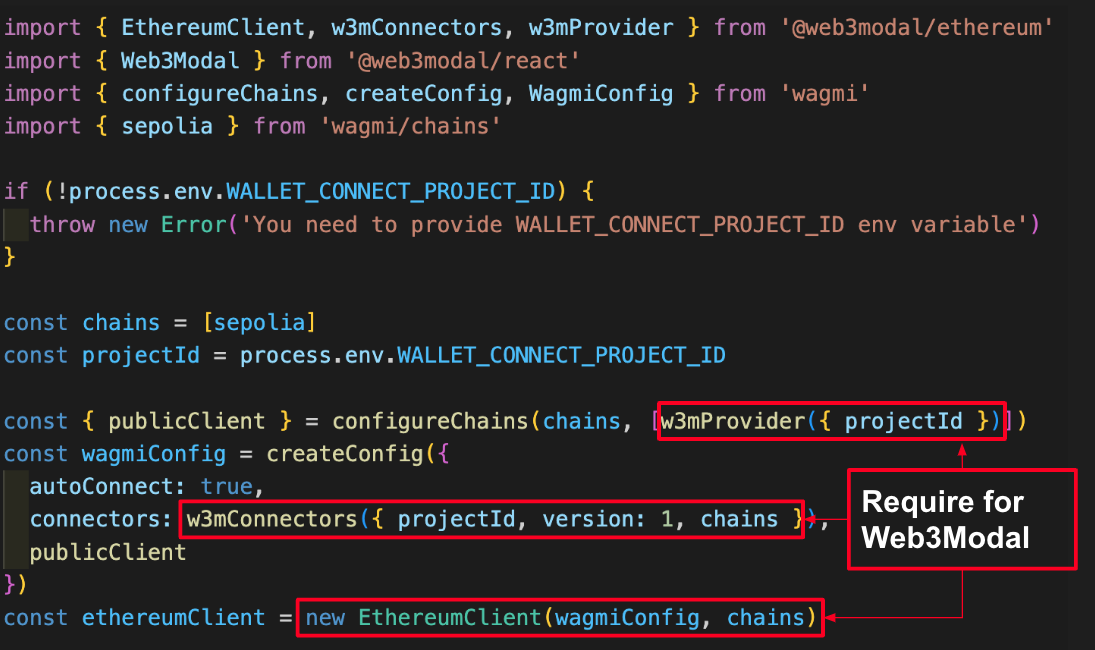
It is not needed to wrap Web3Modal inside WagmiConfig. In fact, it is recommended placing it somewhere outside of the main app, thus removing extra re-rendering work.

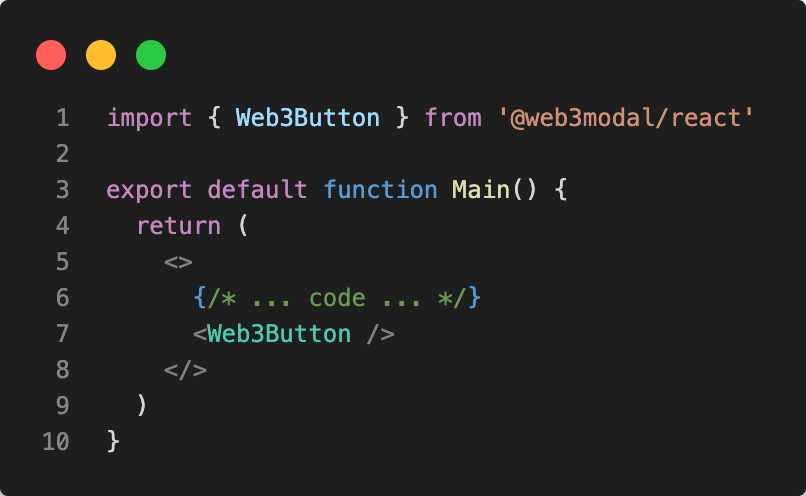
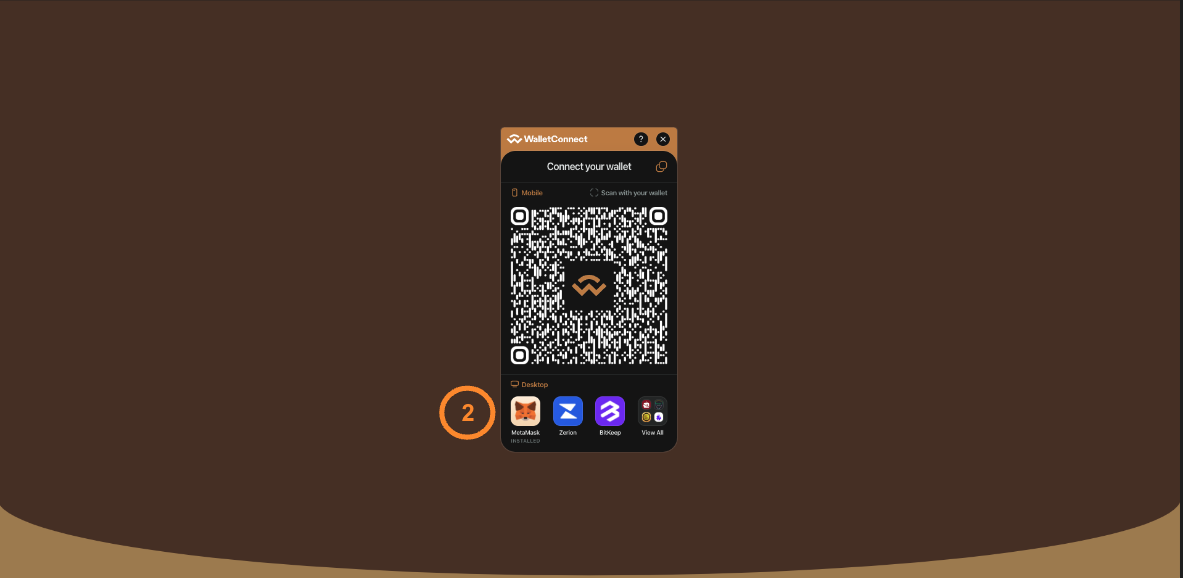
Use pre-built Web3Button component.
From a UI perspective

From a code perspective
Wagmi is a collection of React Hooks containing everything you need to start working with Ethereum. Wagmi makes it easy to “Connect Wallet,” display ENS and balance information, sign messages, interact with contracts, and much more.##
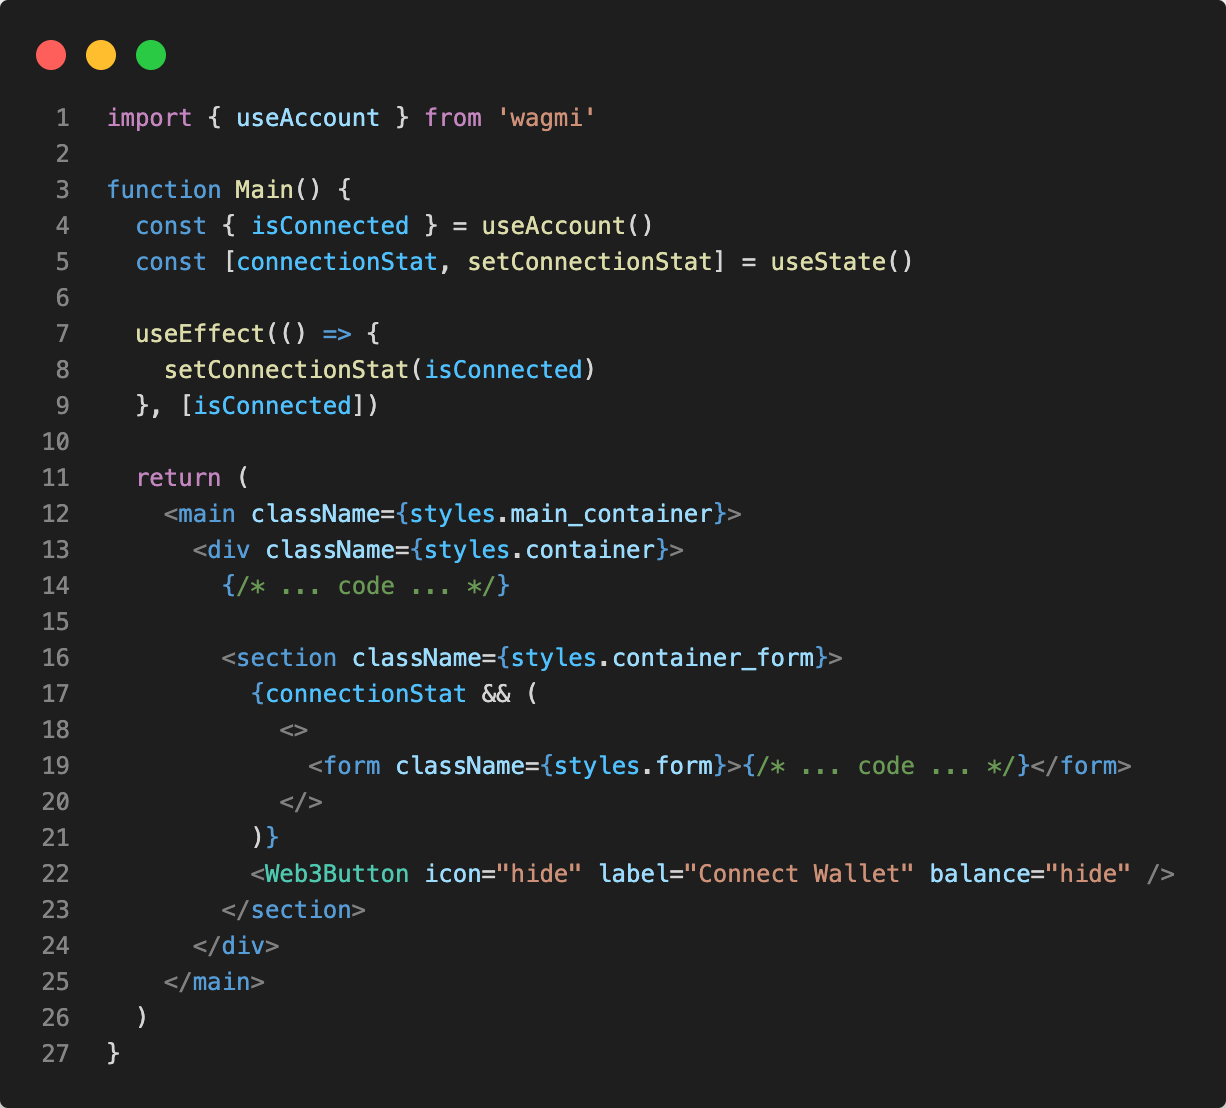
Hook for accessing account data. In this scenario, we utilize the “isConnected” value to determine the user’s login status. If the user is logged in, the form enables them to purchase a coffee by sending Ether to the contract owner, accompanied by a personalized message.
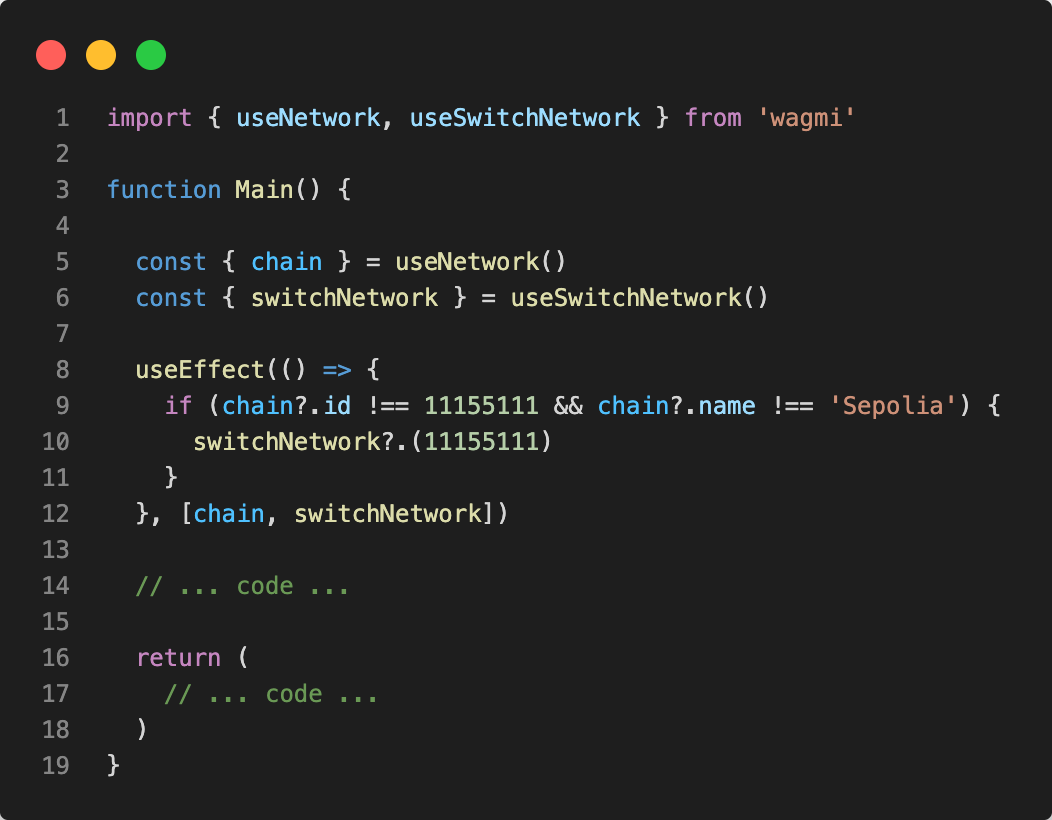
we used useNetwork hook for accessing network data, such as current connected chain (in this case sepolia) and useSwitchNetwork hook to switch network in case the user change the network (using useEffect).
Hook for calling a read method on a Contract.
A “read-only” function (constant function) on a Solidity contract is denoted by a view or pure keyword. They can only read the state of the contract, and cannot make any changes to it. Since read-only methods do not change the state of the contract, they do not require any gas to be executed, and can be called by any user without the need to pay for gas.
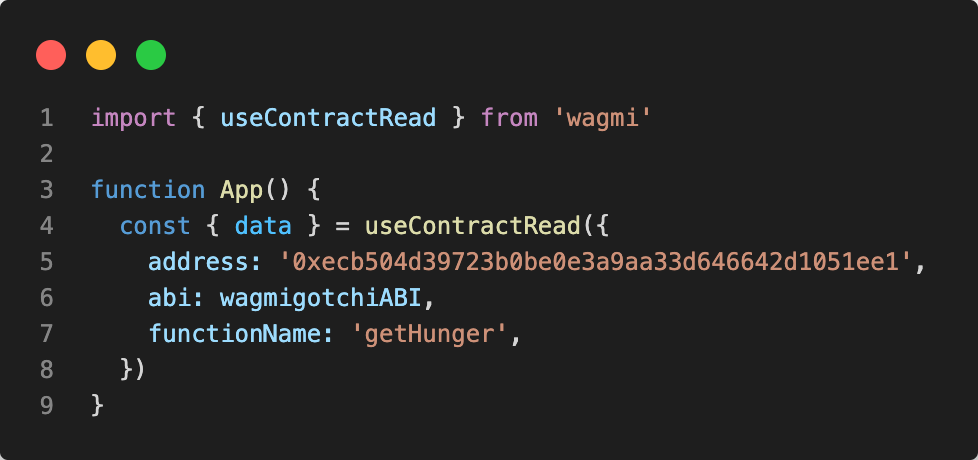
Which address is the contract address, abi is the ABI of the contract (see below), functionName is the function view of the contract and lastly args (if necessary) are the arguments of the contract.
An Application Binary Interface (ABI) for a smart contract is like a mediator that helps the contract communicate and work together with external applications and other smart contracts in the Web3 environment.
In our scenario:
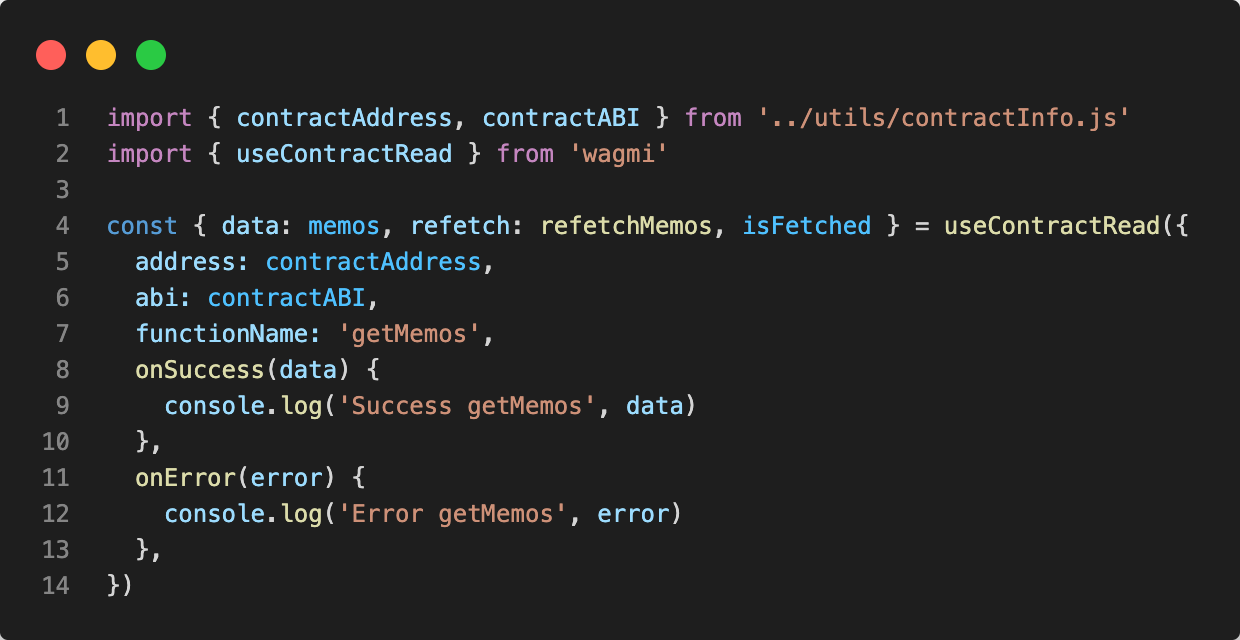
Here get the data that we rename memos through READ call method “getMemos” which retrieve all the memos received and stored on the blockchain.
The variable “isFetched” is initially set to false and becomes true once the READ operation is completed. We use “isFetched” as a conditional statement, and when it evaluates to true, the following code will be rendered.
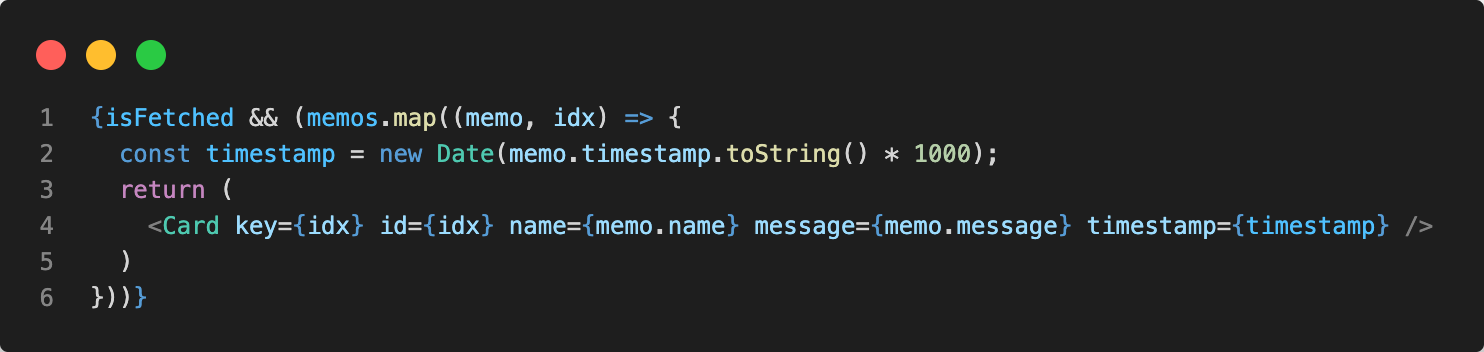
The refetch function (renamed refetchMemos) is a function that simply re-run the READ call method “getMemos” We will see refetchMemos later when on the section of useWaitForTransaction
The Prepare Hooks in Wagmi improve user experience by allowing asynchronous work to be performed ahead of time, before an event is initiated by the user.
This reduces potential delays and helps avoid UX related issues.
The Prepare Hooks generate the necessary parameters for their paired hooks, such as useSendTransaction or useContractWrite, which previously performed long-running asynchronous tasks using the ethers signer.sendTransaction function.
Slow TTOW (Time To Open Wallet) is a problem caused by performing long-running asynchronous tasks between a user interaction and opening the wallet.
This can lead to a delay and confuse the user, especially under slow network conditions.
Here the link where you can find more details and a video demonstrating the difference between a slow TTOW and a fast TTOW.
The configuration needed for the hook useContractWrite is like useContractRead
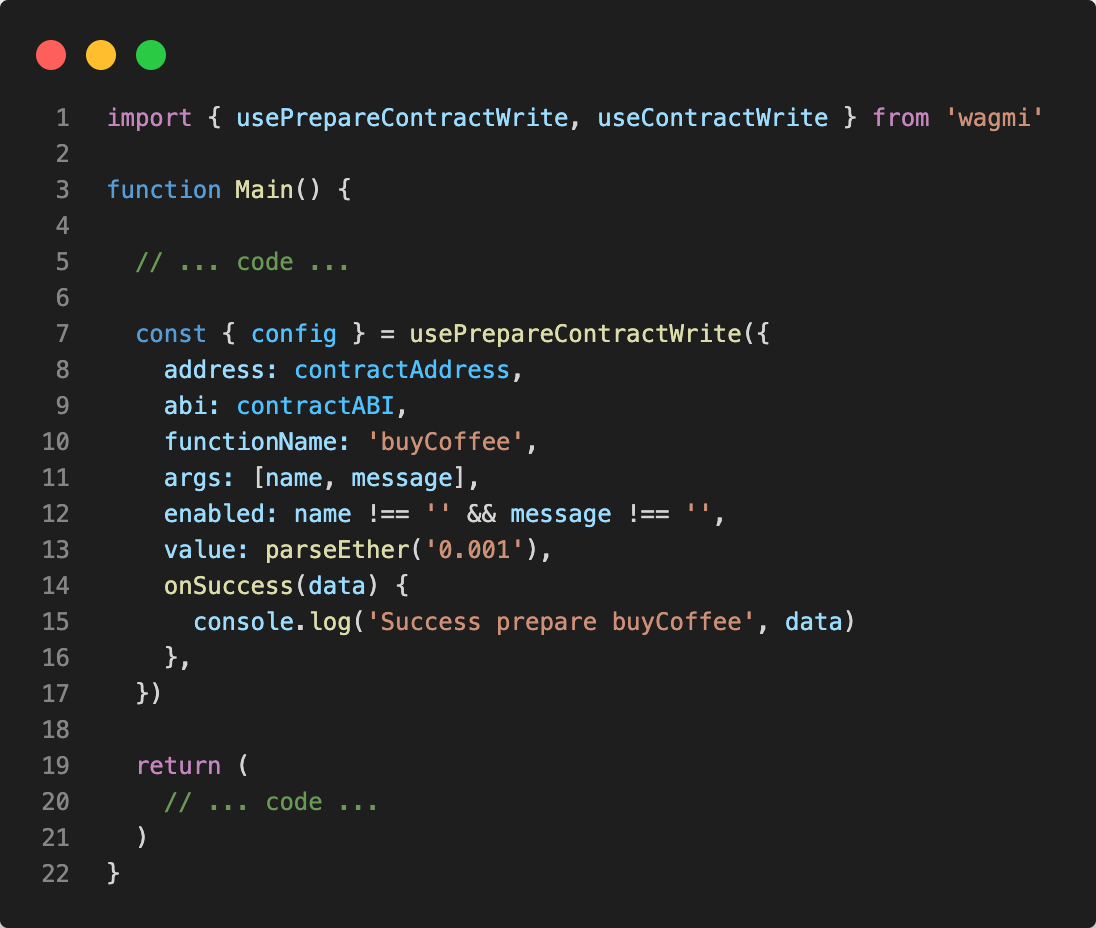
Excluding the properties we already explained in the context of useContractRead (address, abi, and functionName), the remaining properties in the code are:
false to disable this query from automatically running and becomes true once the name and the message variables are NOT empty. Enabled property is used to avoid situation like this: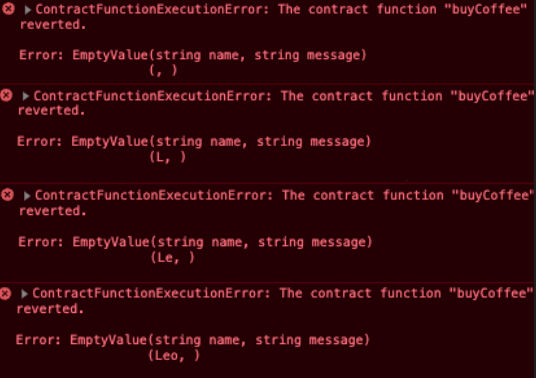
Value; Value in wei sent with this transaction (msg.value in Solidity)
onSuccess: It is a callback function that will be executed when the function call is successful. In this case, it logs a success message to the console, including the data parameter that contains any returned data from the successful function call.
You can also find the onSuccess callback in various other hooks provided by Wagmi. This callback function allows you to perform specific actions or manipulate data when a function or action succeeds. Using the onSuccess callback allows you to modify the hook’s behavior and respond accordingly.
After that, insert the config inside useContractWrite which is hook for calling a write method on a Contract (in this case the buyMeACoffee method).
A “write” function on a Solidity contract modifies the state of the blockchain. These types of functions require gas to be executed, and hence a Transaction is needed to be broadcast in order to change the state.
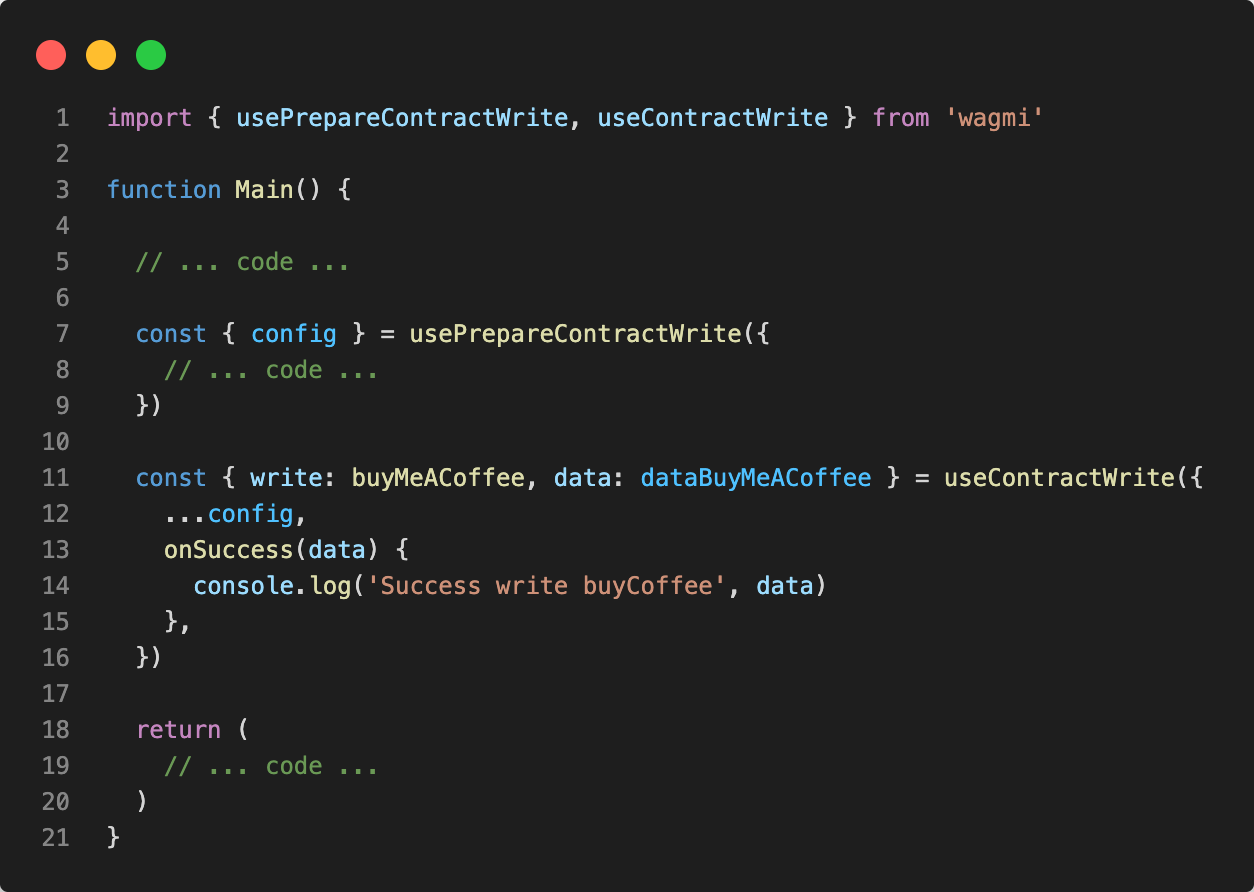
Which { write: buyMeACoffee } can be { write: <name_of_the_function> }.
One of the return values of the hook is write, which is a function that invokes the function of the smart contract.
{ data: dataBuyMeACoffee } represent the Transaction Hash (if is successful) of the write function.
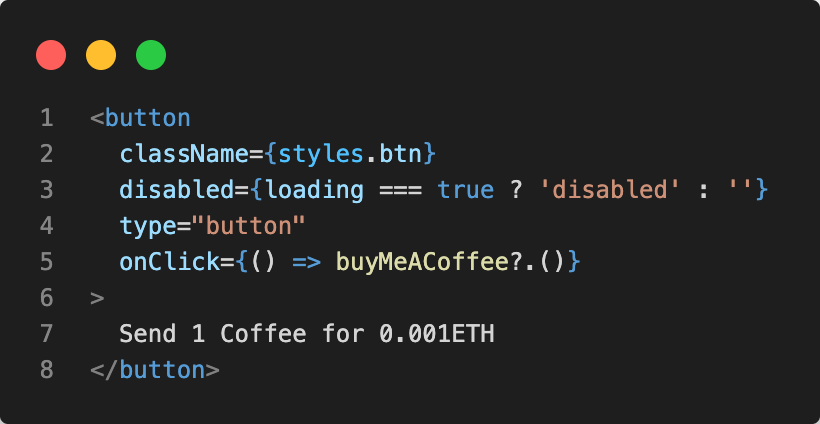
And to activate the write function, it can be placed inside a button or another function.
Waits for the Transaction to be included on a Block (one confirmation), and then returns the Transaction Receipt. If the Transaction reverts, then the action will throw an error.
In this scenario, we utilize the useWaitForTransaction hook to update the memos displayed on the website. This is achieved by re-running the getMemos function from the useContractRead hook (when is successful).
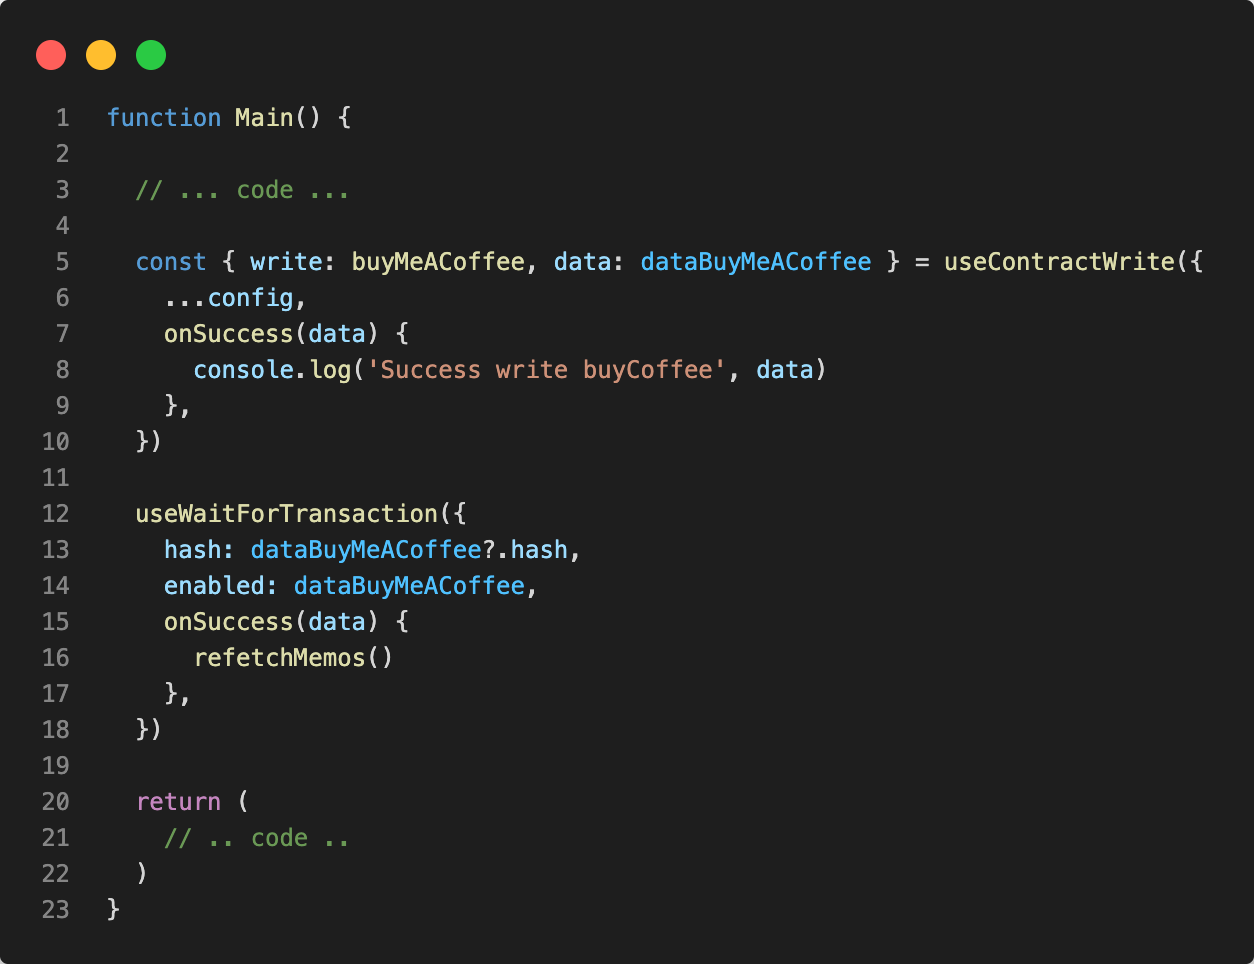
We use the enabled parameter of the useWaitForTransaction hook to wait for the transaction hash generated by the useContractWrite hook.
When the write function (in this case buyMeACoffee) is called and executed successfully, the useWaitForTransaction hook executes and waits for the transaction to be confirmed in a block.
Once confirmed, the refetchMemos function from the useContractRead hook is triggered to update the memos.
Conclusion
In summary, this article provides guidance on integrating WalletConnect and Wagmi into a Next.js application, using the BuyMeACoffee project as an example.
WalletConnect acts as a standard protocol that connects blockchain wallets and decentralized applications to ensure secure transactions. It provides chain agnosticism, enabling convergence across blockchain networks. Wagmi provides a collection of React Hooks that facilitate Ethereum-related development tasks. These hooks provide important functionality such as wallet integration, display of ENS and balance information, message signing, and contract negotiation.
Understanding the capabilities of WalletConnect and Wagmi, developers can leverage their capabilities to create simple and efficient Web3 applications. These tools help grow and sustain Web3 development, and empower developers to make the most of blockchain technology.
Join our newsletter to be the first to know when we start building new projects and other updates from Ethereal.
We care about your data in our privacy policy.